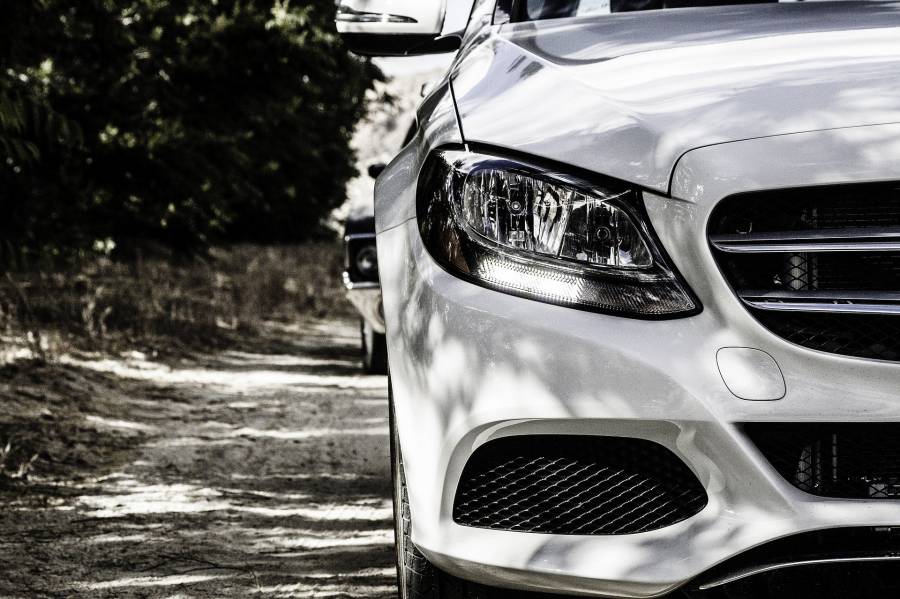
The black headlights have been more and more popular recently. They give the car an attractive look but also provide a functional purpose.
Many people think that only expensive cars have blackout headlights. But this is not true – you can have them too, regardless of your vehicle’s year and model.
So, if you want to know more about how to blackout headlight, you are at the right place because, in this article, we will discuss everything there is to know about the blackout headlight.
Let’s begin.
DIY Headlight Blackout
The blackout headlights are nothing but just black headlights. It is simple customization where the entire lens of the headlight is tinted black.
The whole housing of the light is also made black so that everything matches one another.
It is usually done by tinting the headlights or merely wrapping them in the vinyl sheets of the desired color.
Generally, young car owners often choose to paint over their headlights to enhance the look of their cars.
They usually choose a contrasting color that is attractive and matches the color of their vehicles. Cars with blacked-out headlights stand out among the rest.
Modifying the lights on your car can give you a great look while also providing some safety benefits.
The Blackout layer shields the headlight cover from different scratches and damage.
It also prevents the sun’s UV rays from fading the shine of headlights and protects it from getting yellow over time.
Methodology To Blackout Headlights
Tinting headlights seems like a simple job when you first imagine it, but many people are intimidated by the task once they try to do it.
Basic knowledge of mechanics and materials is needed, and specialized tools like hairdryers and heat guns can use.
However, you can manage to perform it under the light of proper guidance and technique.
Tools Required
Working on your car without a few essential tools can be frustrating. A simple function such as blacking out a headlight, for instance, requires the right equipment.
Before you get started, you’ll need to gather all the right tools and materials.
Following are the necessary tools we need to acquire to blackout headlights.
Screwdriver
Spanner or Wrench
Heat Gun
Sandpaper
Masking Tape
Paint (any desired color plus primer, base coat, and clear coat)
Spray Gun
Disassembling
You will need to open up the headlight assembly to work on it. We’ll go step by step through how to do that down below:
Remove The Bumper
We’ll start by removing the bumper. We’ve found that sometimes bumpers, designed to hold a car’s headlights in place, can prevent you from taking off the headlights.
So we’ll need to remove the bumper first. We’ll use a wrench to loosen—or “unbolt”—the bolts that hold it in place, and then we’ll pull the bumper off and take it apart.
Take Off The Headlights From The Car
Now that we’ve pulled off the bumper, remove the headlights. We will need a screwdriver to remove the screws that hold the headlight on.
Each headlight has wires that connect it to the vehicle’s electrical system. A connector connects these wires to the lights so you can remove them quickly.
Once we unplug this connector, we can take out the light.
Remove The Housing Of Headlights
The most challenging part is to remove its housing, which is a transparent case enclosing the light lenses.
This housing is firmly attached to the headlight with the help of glue.
We will use a heat gun to melt glue and loosen its grip. After a while, the bond will get weak, and the housing will separate.
Separate The Lenses Or Bulbs
Paint reduces the illumination of lenses and distorts them. Therefore, smoothly remove the light lenses from the headlights to prevent color stains and marks.
Any stain or streak of paint can dim the headlight bulbs.
Cleaning And Sanding
After disassembling all headlight parts, observe each piece thoroughly that you want to paint.
If you notice any dirt or corrosion on any component, consider cleaning that part.
Removing the decay is important because the paint layer does not last long on the corroded object.
You can remove the corrosion with the help of sandpapers. To dismiss the decay, you also need to rub the sandpapers on the affected point.
Moreover, sandpapers remove the painted layer from the objects and charge the surface to prepare it for new paint.
Sanding clears the surface of an object and makes it a little rough. This rough surface allows the new layer of paint to stick firmly.
Apply The Masking Tape And Create Your Pattern
Masking tape is generally a thin layered tape with more minor adhesive characteristics than regular ones.
A user can remove it conveniently after application, and it does not leave any mark behind. Painter’s tape is another name for the masking tape.
Therefore, we will apply the masking tape to the areas not meant to paint.
You can create different patterns and designs by using this tape to keep that designed surface unpainted.
Warning Note
Do not remove the painter’s tape unless the paints get completely dry.
Applying The Spray Paint
After masking off and forming the required patterns, we will spray the paint.
Fill the spray gun tank with the desired color and spread it uniformly on the headlight parts. Before painting, ensure to put on a safety dress like gloves, face masks, etc.
Select a ventilated place to color the objects because the paint contains VOC (volatile organic compounds).
These compounds are fatal and can cause respiratory problems.
A place with proper airflow diffuses this toxic compound into space and reduce their presence in that area.
Allow The Paint To Dry
Try to apply just two layers of paint because coating more paint layers can blur the light, stopping it from penetrating these dense layers.
Let the layer dry completely before coating the second one. You can touch the painted object to check whether it has dried up or not.
You can dry the painted objects by placing them in the sunlight. The scorching heat of the sun will dry this painted layer more quickly.
You can also use a heat gun or hairdryer to achieve this task, especially in winters.
Once the paint is fully dry, we will remove the masking tape carefully.
Assembling And Final Thoughts
Time to put everything back together. First, grab your screwdriver or socket wrench and begin.
Paint has been applied, so you’ll be able to identify which screw goes where (use the exploded diagram as a guide).
Attach all the components properly and ensure the headlights are working correctly by switching them on.
Polish the car with car wax, and see how great it looks with new headlights!
The Takeaway
Blacking out a car’s headlight is a simple task that requires essential tools and DIY skills. You can do this for a custom look or conceal damage on your headlights.
Blackout headlights are also good at concealing damage to your vehicle’s headlights. It could be scratches, rock chips, cracks, and other damage.
It’s cheaper than getting a replacement part or repairing it and makes your car look cleaner overall.
Patrick started his love affair with cars in his childhood. Over the years, he claims a sturdy hold on his driving skills, along with a thorough understanding of cars. We can expect some interesting, holistic, and pleasurable blogs with his flair for writing and his love for cars.
Being a car enthusiast, Patrick has experience comprising of two decades in which he has ridden some of the meanest and strongest machines in the automotive industry. His previous avatars include an automotive professional, photographer, and journalist, and you will certainly experience the roundness of experience in his piece on this site.
In his second decade of reviewing cars and analyzing tools, Patrick is all set to give you convincing, reliable, and the latest information regarding what’s happening in the automotive industry. Currently, he owns a BMW Z3 but cannot get his eyes off Aston Martin DB5. He is a car enthusiast; he loves cooking and listening to music, especially jazz. Here are some of the pieces written by our ace author.