Quick Navigation
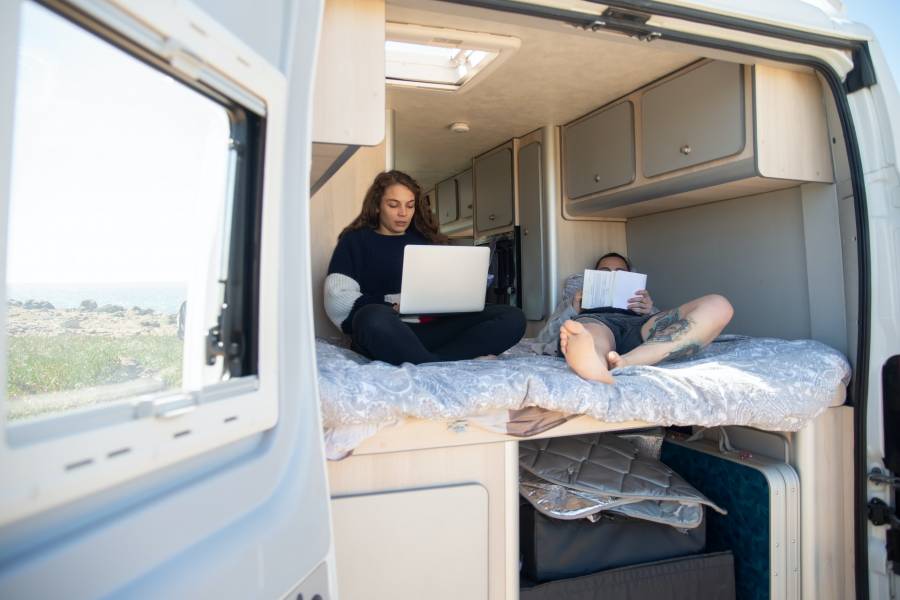
Most recreational vehicles you will find in the market are bunk models, and their demand is much higher.
In most designs, you’ll find bunk beds across the rear of the trailer. Bunkhouse RV models have their bunk beds set up in a room right beside the bathroom or kitchen.

In some campers, bunk beds are incorporated into the body design to help maintain structural integrity or squareness.
In addition, the bunks help keep the weight balance for some RVs.
Types of RVs that you are likely to find bunk beds:
- Passport Ultra Lite 290BH
- Passport Ultralite 28bh
- Imagine 2400BH
- Imagine XLS 21BHE
- Imagine XLS 23BHE
- Arctic Fox 275B fifth wheel
- Winnebago Micro Minnie
- 1995 T2670 – Sunline Solaris
- Jayco Jay Feather X213
- North Trail NT 24BHS
Space is of the essence in an RV, especially when you have plenty of stuff you do not wish to leave behind.
Unfortunately, creating extra space in a trailer means something will have to go. And in most cases, removing RV bunk beds is the most common solution.
You do not have to get a new camper when you can remove the bunk beds in your bunkhouse RV.
As much as this decision may change the RV’s resale value or weaken the engineered wall structure, it is worth trying.
Here is a complete guide that you can use whenever you are thinking of removing your RV bunk beds:
Removing RV Bunk Beds
Understanding The Scope
Before removing RV bunk beds, you need to determine whether they are part and parcel of the body structure.
This first check will prevent you from damaging and ruining things as you unscrew various parts of the bunk.
Also, you will need to determine how the bunk bedside supports and the cross members are attached to the wall.
Usually, the RV bunk beds are fixed directly to the side walls with one side to the bathroom or kitchen wall.
Tools
Removing RV bunk beds without damaging or compromising the walls requires that you have the following tools:
- A screwdriver – star, square
- A hammer or mallet
- A Prying tool – flathead screwdriver and long crowbar
- A hammer and a chisel (optional)
- An oscillating tool with a carbide blade (optional)
- A joint knife
- Safety gear (Safety Goggles and half-mask respirator)
The tip of the screwdriver will depend on the nature of the screw. You are likely to find that most installations in RVs use star-headed screws.
You must use the right tools for the bolts or screws in your bunk bed model.
The Process
Before you embark on removing RV bunk beds, you need to consult the paperwork or detailed construction drawings about them.
You may also need to put painter’s tape around the perimeter as a preventive measure against scuffing up the wall.
In addition, some bunks have water pipes and electrical wires that run through them.
Therefore, you may need to disconnect your battery beforehand so that you do not short the wires and blow a fuse.
Exposing The Inside Structures
First, remove the mattress pads and beddings on your bunk bed. Next, make sure that what you can see are only the wooden or metallic structures that are now exposed.

Separating The Top And Bottom Bunks
The second step is to separate the top bunk from the bottom bunk. You can do this by carefully unscrewing the bolts that hold the two parts together – if there are any.
If your bed bunks come with a ladder and safety side rails, these are the first things to go.
If the bunks are independent, the next step will be to remove the paneling sheets at the top and bottom of the bunks to expose the framework (2×2 or 1×1).
Exposing The Screws And Bed Frames
The third step will be taking off the plywood lying on the top and base of the upper and lower bunks to expose the frame.
Finally, prying up the top board allows you to check whether wires run through the structures.
Depending on the design of the bunk bed, the plywood may be screwed or glued to the framework.
Removing RV bunk beds starts with the top bunk, which is the most difficult to remove.
So, you will need to remove the thin luan plywood to expose the supports, 2×2 frames, and trim screws.
Removing Screws And Bolts
The next step will be locating the screws. You’ll find several screws underneath the bunks along the joints linked with the sidewalls.
Again, you can use a screwdriver to back out the screws or bolts.
As for hidden screws, you can use an oscillating tool with a carbide blade to cut right through them and avoid the risk of damaging the walls or anything around them.
The top and bottom bunk bed frames link to the walls from the outside.
You may only be able to get the screws out from the inside where the frame backs up to the kitchen or bathroom wall.
The most challenging part will be dealing with the outside screws and ripping off the wallboard. You may need extra hands to remove the bunk beds from the walls.
Removing Any Additional Bed Support
After removing all screws, bolts, or slides holding the bunk beds in place, you can now remove any under pieces that you might come across between the bed and the wall to expose more screws.
The braces used to secure the screws to the framework are likely to be aluminum material.
Finishing And Sealing Off Any Damages
You may choose to leave the boards on the walls in case you are looking to install some shelves on any wooden structure on them.
Others may decide to leave the support rails fastened to the walls so that they do not mess with the trailer’s appearance and structural integrity.
The only damages you are likely to get on the walls are scratches and screw holes.
To rectify that, you can apply some filler or wall putty and see your walls ain back their beauty.
Another option will be to use wallpaper trim or borders to cover the holes on the surface of the walls.
But, again, if you wish to resell or re-use the bunk beds, the process should be smooth and with minimal damage.
Removing RV bunk beds can take at least 15 minutes if you have the right tools and someone to help you.
Some bunks are well secured to the walls of the trailer with long staples, which are not too difficult to remove.
If you are careful, you can safely remove your RV bunk beds without damage. This complete guide should be helpful in your upcoming project.
Take Away
Removing RV bunk beds is a gamble if you have no idea whether removing the bunk beds will affect the stiffness of the camper.
The most important thing to consider is maintaining the recommended weight when converting the new space.
Lowering the tongue weight can upset the towing stability.
In case your bunk beds are permanently mounted, you may need to visit your dealer’s shop for some professional help.

Patrick started his love affair with cars in his childhood. Over the years, he claims a sturdy hold on his driving skills, along with a thorough understanding of cars. We can expect some interesting, holistic, and pleasurable blogs with his flair for writing and his love for cars.
Being a car enthusiast, Patrick has experience comprising of two decades in which he has ridden some of the meanest and strongest machines in the automotive industry. His previous avatars include an automotive professional, photographer, and journalist, and you will certainly experience the roundness of experience in his piece on this site.
In his second decade of reviewing cars and analyzing tools, Patrick is all set to give you convincing, reliable, and the latest information regarding what’s happening in the automotive industry. Currently, he owns a BMW Z3 but cannot get his eyes off Aston Martin DB5. He is a car enthusiast; he loves cooking and listening to music, especially jazz. Here are some of the pieces written by our ace author.


